| Where: | Mabe Village |
| Why: | Early item access; Exploration |
WARNING: This glitch *can* permanently ruin a game file and, in the extreme case, possibly even erase or damage your cartridge. 99.99% of the time, everything is just fine and safe, though, and the worst that can happen is that you get stuck in a wall, in which case you save and quit or turn off the game to return. Any saving done in the glitched Kennel Dungeon will make you restart in the middle of Marin's House with all goods you've acquired, so escape is fairly easy. The only real dangers will be listed in the respective pages on the kennel glitch. The one thing you want to avoid AT ALL COSTS, however, is venturing in the screen labelled as 'GLITCH' on the Second Underworld map (see the map section for it), as that can cause your game to screw up pretty badly.
While that may seem like an intimidating warning, I've never lost any data myself with all the screwing around with this glitch, so you'll most likely be safe as well. Just be careful!
|
To start using the glitch, you need only a sword. You can create a file entirely meant for exploring the Kennel Dungeon or pop in for a visit on a partially (or wholly) completely game all the same. The best dungeon to explore, however, is one in a fresh file with no treasure chests opened, as unopened chests contain goodies (more on this if you read further).
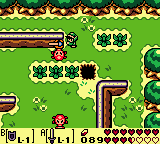
There's but one task before heading into the depths: kill a few enemies. |
 |
Any tile (an 8x8 pixel square in the background) can have a few different properties. Think of every different use of tiles in the game normally: You have standard ones like floor patterns that you just walk over; you have walls that are impassable; there're spike traps and pits; there's exits and entrances. There's many, many different physical aspects that can be assigned to any tile. However, any one type of tile (floor, pit, left/right/up/down wall, etc.) will ALWAYS have the specified attribute. Thus, if one hole counts as a water tile, every hole tile in the dungeon will be the same. Just remember that some tiles that look similar may be different: walls can differ depending on which direction they face, plain holes differ from holes with a little bit of ground sticking out, crystal switch blocks differ when up and down, etc. What you generally want is a dungeon full of walkable tiles. Sometimes you can get some pretty bad tile combos: for example, every wall facing up in the 5-foe dungeon counts as an exit. Thus, every time you scroll up from a screen into a new one with a wall facing up (very common!), you will get transported out of the dungeon.
This leads me to one last final note before I go on to the glitch: Exits are not your friend. There are many things that can happen in the dungeon if you hit an exit tile. In the beginning of dungeon exploration, you'll just get transported to Underworld 2 with a pretty lame tile assignment -- you can't even open chests! (Plus, the starting tile is assigned to water, so you'll just constantly drown unless you scored the flippers.) Other things that can happen are more annoying. You could, depending on a few factors, be sent to the inside of a normal dungeon, stuck in place due to floor tiles having wall properties. Other times, you may get teleported into a wall there, but even then you'll have very limited movability. Few uses exist for entering areas once inside the Kennel Dungeon, so try to steer clear of the exit tiles if you can.
There'll be more interesting things to see once in the dungeon, but you can see those after I explain how the heck to get in!
| Enemies Killed | Maneuverability | Treasures | Notes |
| 1 | Low | Little | Chests are NOT infinite; easy to get stuck |
| 2 | (Null) | None | Immediate teleport to Underworld 2 |
| 3 | Medium | Medium | Many tiles are exits; can be difficult to get around; some errors can occur |
| 4 | High | High | Easy dungeon to explore with many great items to be found; good dungeon to start exploration with |
| 5 | High | Medium | Suggested to explore after 4-foe dungeon |
| 6 | None | None | Floor tiles are walls; impossible to budge once entered |
| 7 | High | Low | rather low treasure yield; A specific chest causes the game to crash |
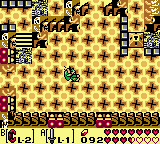
| There are some general attributes to the dungeon that can be observed in most renditions. For example, while you can walk on floor-assigned tiles, chances are that you won't be able to pick some things up (though you can in some cases if you get close enough). Also, the walkable tiles can bar travel of some things including: Magic Rod fire, arrows, enemy fire, etc. You'll have to test walls if you want to see what they all do. For example, Link can grab onto nothing in the pic on the right. While this might seem kinda lame at first, rest assured that there are some benefits sometimes: you may be able to shoot an arrow over unwalkable tiles to make a chest appear, for example. |
 |
|
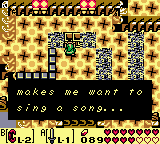
The real reason to explore the dungeons is for treasure, of course. While most chests contain snippets of text and some graphics (though giving you nothing), a select few give you items. You can check out what's
obtainable in each dungeon by visiting the respective page for the dungeon on this site. (work-in-progress....) What's awesome is that the chests never count as becoming empty - if you scroll over and back a screen, the chest is refilled with the same item! This means that you can always come back and stock up on things like Rupees, Seashells, or Medicine. There is a catch, however: if you empty a chest on the normal gameplay, the chest WILL forever be empty. Thus, dungeons are best explored before you touch any chest contents while playing normally. |
 |
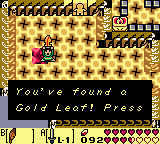
| Also, all small keys dropped from above will become Golden Leaves. While it's cool to collect all five, it's not recommended to go further. After 5 leaves, the next dropped feather will become the Slime Key, but I'm pretty sure it doesn't unlock the Slime Gate. Even if you go and dig up the real slime key, it will be a Golden Leaf, so the only safe way to obtain the Slime Key is to get 5, visit Richard, and dig up the key legitimately. |
 |
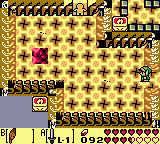
| Watch out for enemies. The best thing to have is a good memory and a few playthroughs under your belt. Most enemies will be glitched, so knowing what's what requires a knowledge of the game. Also, some enemies can be partially or completely invisible (like these Pairodd in the picture), so be careful. |
 |
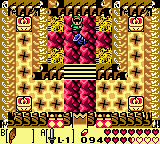
| One last thing: avoid Instrument, Mini-Boss, and Nightmare rooms. Instrument Rooms are usually sealed on the left, right, and bottom no matter what the tileset. It might be tempting to get the instrument, but doing so will make Link vanish and the game to stop, forcing you to turn off the game. Mini-bosses and Nightmares have the same wall restrictions. While you can defeat Nightmares to score Heart Containers, if you kill a Mini-Boss, the game will freeze, so escape instead of fighting. |
 |