February 8th, 2017
Editor’s note: This post is part of our Trainspotting series, a deep dive into the visual and audio detection components of our Caltrain project. You can find the introduction to the series here.
SVDS has previously used real-time, publicly available data to improve Caltrain arrival predictions. However, the station-arrival time data from Caltrain was not reliable enough to make accurate predictions. Using a Raspberry PiCamera and USB microphone, we were able to detect trains, their speed, and their direction. When we set up a new Raspberry Pi in our Mountain View office, we ran into a big problem: the Pi was not only detecting Caltrains (true positive), but also detecting Union Pacific freight trains and the VTA light rail (false positive). In order to reliably detect Caltrain delays, we would have to reliably classify the different trains.
Traditional contextual image classification techniques would not suffice, as the Raspberry Pis were placed throughout the Caltrain system at different distances, heights, and orientations from the train tracks. We were also working on a short deadline, and did not have enough time to manually select patterns and features for every Raspberry Pi in our system.
TensorFlow to the rescue
2016 was a good year to encounter this image classification problem, as several deep learning image recognition technologies had just been open sourced to the public. We chose to use Google’s TensorFlow convolutional neural networks because of its handy Python libraries and ample online documentation. I had read TensorFlow for Poets by Pete Warden, which walked through how to create a custom image classifier on top of the high performing Inception V3 model. Moreover, I could use my laptop to train an augmented version of this new model overnight. It was useful to not need expensive GPU hardware, and to know that I could fine tune the model in the future.
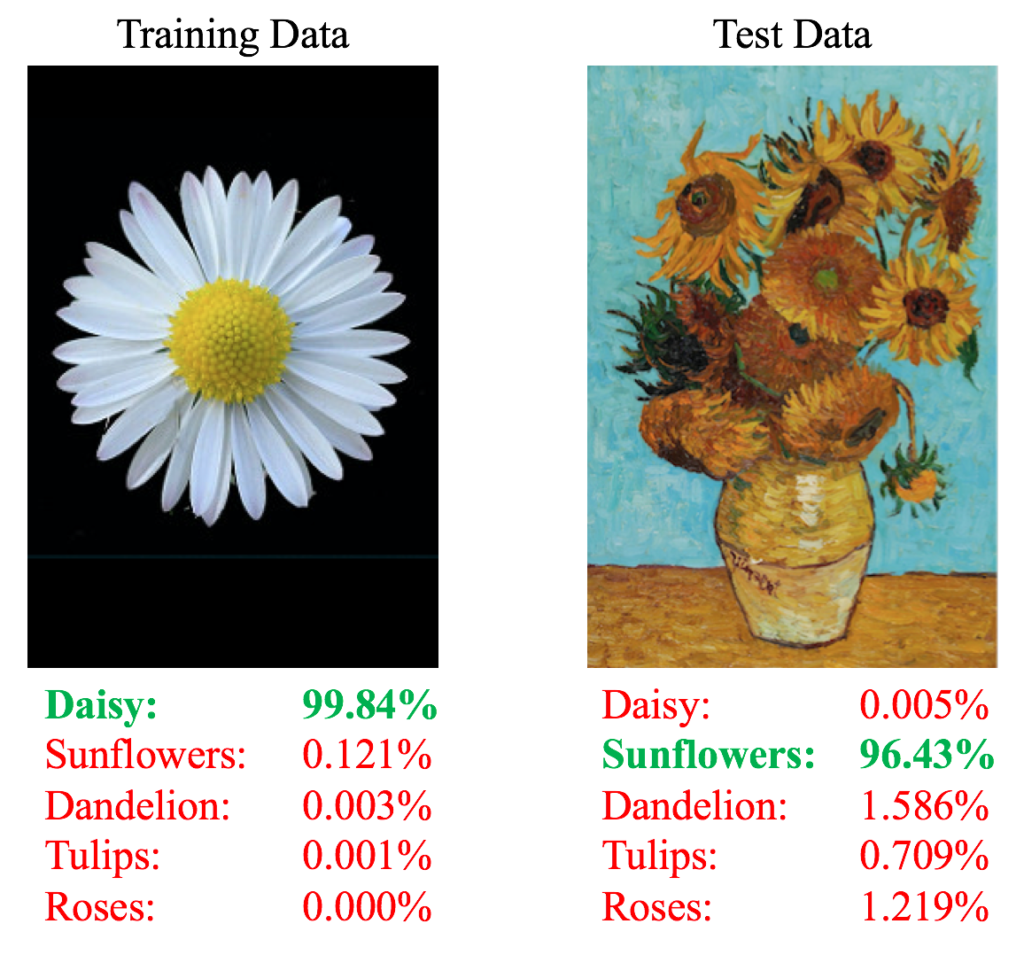
I started with the Flowers tutorial on the TensorFlow tutorials page. I used the command line interface to classify images in the dataset, as well as custom images like Van Gough’s Vase With Twelve Sunflowers.

Now that I had experience creating an image classifier using TensorFlow, I wanted to create a robust unbiased image recognition model for trains. While I could have used previous images captured by our Raspberry Pis, I decided to train on a larger more varied dataset. I also included cars and trucks, as these could also pass by the Raspberry Pi detectors at some locations. To get a training data set, I utilized Google Images to find 1000 images for the Vehicle classifier:
- Caltrains
- Freight Trains
- Light Rail
- Trucks
- Cars
Testing and deploying the model
After letting the model train overnight, I returned to my desk the next morning to see how the model performed. I first tested against images not included in the training set, and was surprised to see that the classifier always seemed to pick the correct category. This included images withheld from the training set that were obtained from google images, and also included images taken from the Raspberry Pi.

I performed the image classification on the Raspberry Pi to keep the devices affordable. Additionally, as I couldn’t guarantee a speedy internet connection, I needed to perform the classification on the device to avoid delays in sending images to a central server.
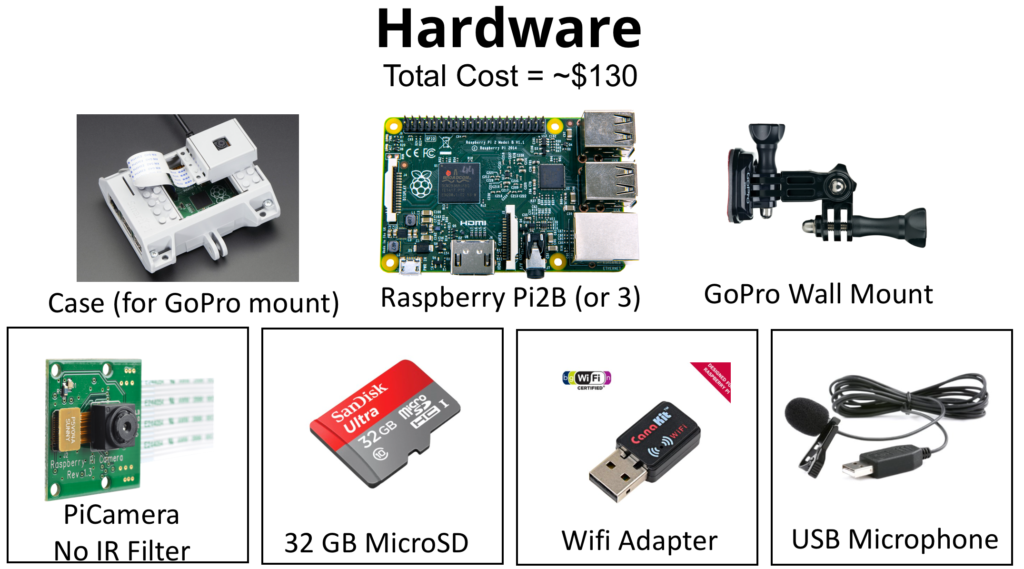
The Raspberry Pi3 has enough horsepower to do on-device stream processing so that we could send smaller, processed data streams over internet connections, and the parts are cheap. The total cost of the hardware for this sensor is $130, and the code relies only on open source libraries. I used JupyterHub for the testing, allowing me to control Raspberry Pis in multiple locations. With a working Vehicle classifier set, I next loaded the model onto a Raspberry Pi and implemented it in the audiovisual streaming architecture.

In order to compile TensorFlow on the Raspberry Pi 32 Bit ARM chip, I followed directions from Sam Abraham’s small community of Pi-TensorFlow enthusiasts, and chatted with Pete Warden and the TensorFlow team at Google.
Troubleshooting TensorFlow on the Raspberry Pi
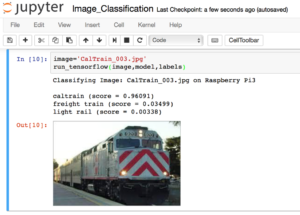
While it is well documented how to install TensorFlow on an Android or other small computer devices, most existing examples are for single images or batch processes, not for streaming image recognition use cases. Single images could be easily and robustly scored on the Pi, as a successful classification shows below.

However, it was taking too long to load the 85 MB model into memory, therefore I needed to load the classifier graph to memory. With the graph now in memory, and the Raspberry Pi having a total of 1 GB of memory, plenty of computational resources exist to continuously run a camera and microphone on our custom train detection Python application.
def create_and_persist_graph():
    with tf.Session() as persisted_sess:
        # Load Graph
        with tf.gfile.FastGFile(modelFullPath,'rb') as f:
            graph_def = tf.GraphDef()
            graph_def.ParseFromString(f.read())
            persisted_sess.graph.as_default()
            tf.import_graph_def(graph_def, name='')
        return persisted_sess.graph
That said, it was not feasible to analyze every image captured image from the PiCamera using TensorFlow, due to overheating of the Raspberry Pi when 100% of the CPU was being utilized In the end, only images of moving objects were fed to the image classification pipeline on the Pi, and TensorFlow was used to reliably discern between different types of vehicles.
Conclusion
If you are interested in classifying images in realtime using an IoT device, this is what you will need to start:

In the next post in this series, we’ll look at connecting an IoT device to the cloud. Keep an eye out, and let us know in the comments if you have any questions or if there’s something in particular you’d like to learn more about.